
Required special tools
| OEM #Number | Midlock aftermarket # nummer |
| 3387 | VW-1(Z-3576) |
| T10008 | VW-141 |
Required spare part numbers
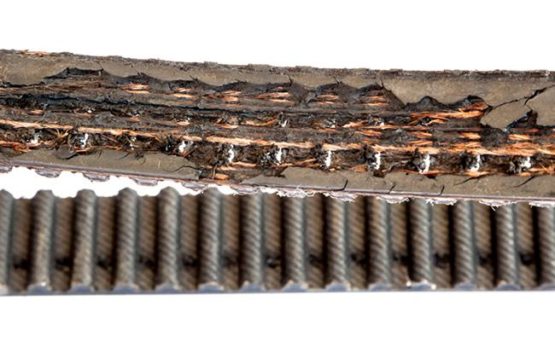
| Replacement: every 5 years | OEM # number |
| Timing belt | 06B 109 119 A
Note: Some tuners offer special blue extra reinforced high power versions |
| Tensioner | 06B 109 243 F |
| Timing belt guide | 06B 109 244 |
| Water pump (optional) | 06A 121 012 X |
| Drive belt dry-sump (annually, when fitted) | Goodyear Super Torque, S8M 600, 04556003, 10611904 |
| Poly -Vbelt | Gates 6PK750 |
Tightening torques
| Timing belt cover | 10 Nm / 1,0 kgf.m |
| Krank pulley bolts | Replace! |
| Phase 1 | 10 Nm / 1,0 kgf.m |
| Phase 2 | +90 degrees |
Preparation jobs
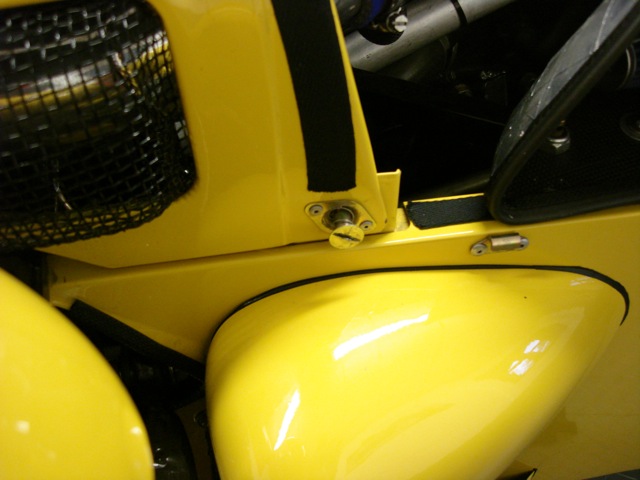
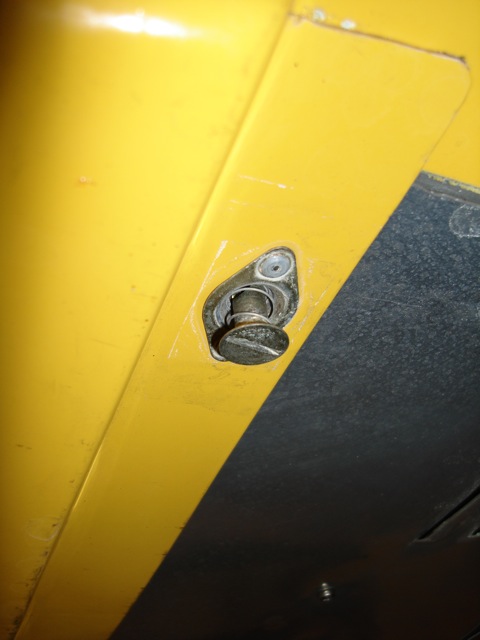
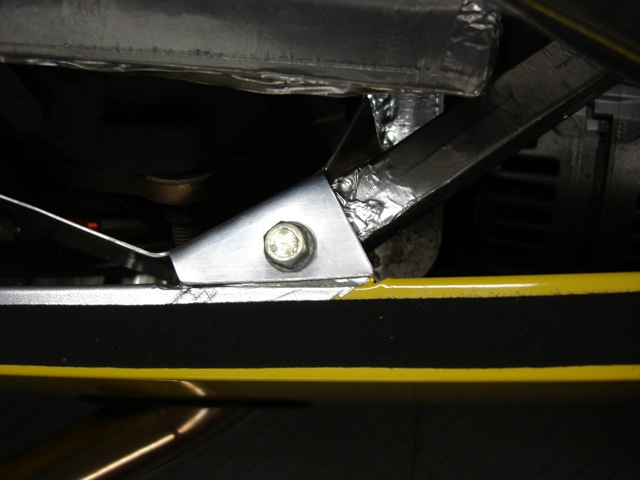
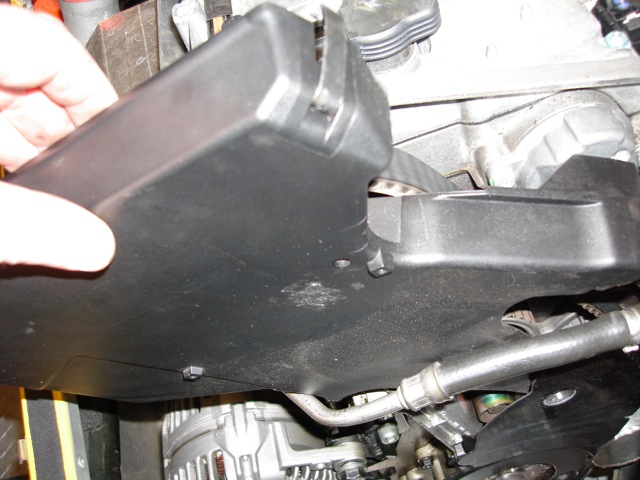
Remove the upper and lower spring pressure assisted nose cone fixation screws by turning them counter clockwise as shown in the images.
Remove the intercooler connector plug from the intercooler, remove the intercooler connecting clamps (4 pcs.) and remove the intercooler core from the car.
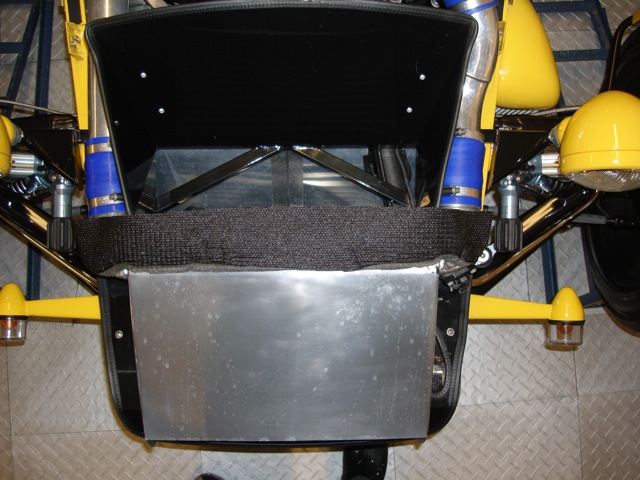
Remove (8 pcs.) mounting bolts from the intercooler nose cone spoiler (4 x inner en 4 x outer).

Remove the guiding tube above the alternator.

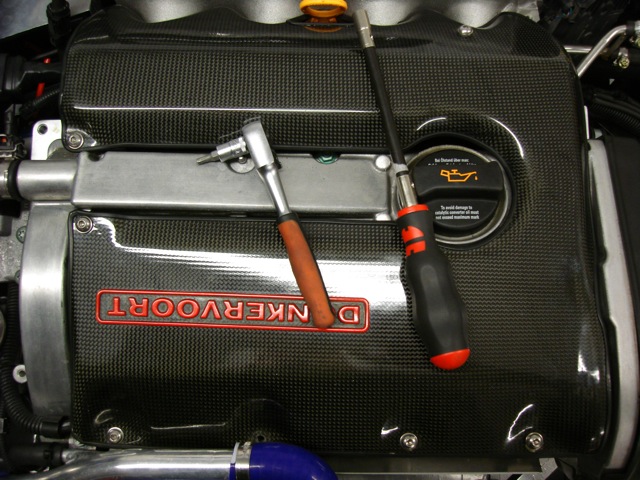
Remove the carbon engine cover.
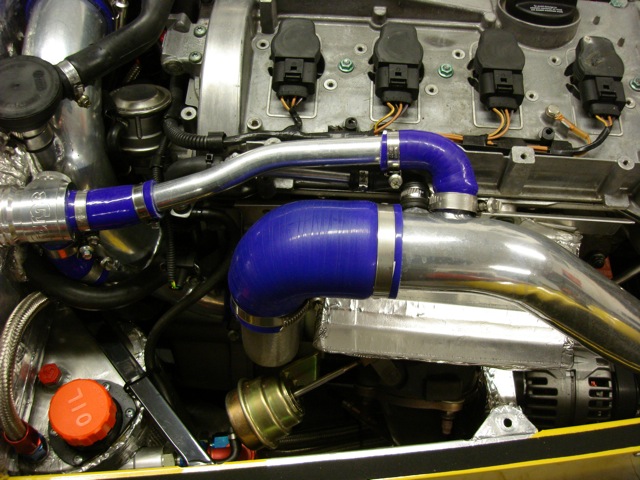
Remove the turbo hose on the pressure side.
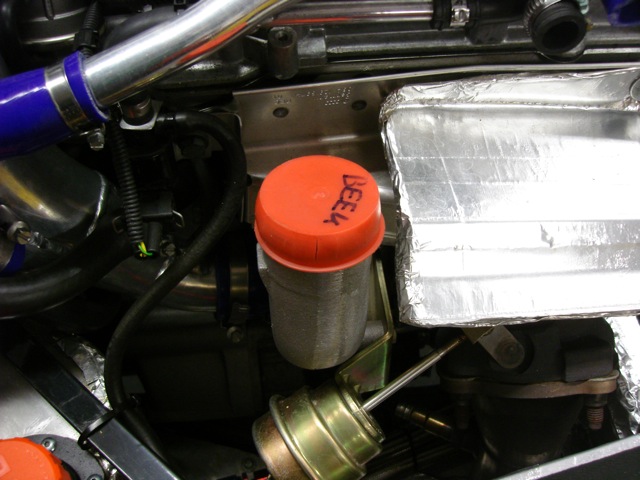
Protect the turbo against dirt with a suitable cover (orange part as shown).
Timing system 1.8 T 20V exploded view
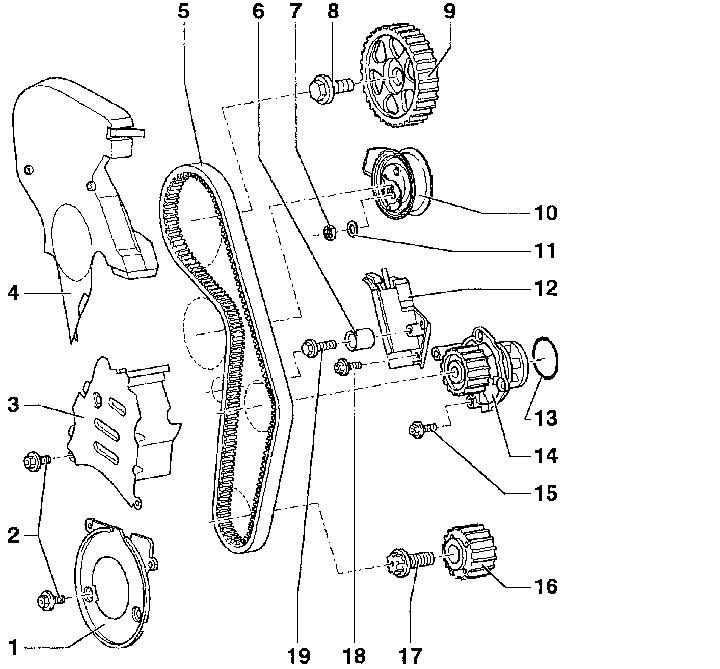
| 1 | Upper part timing belt cover (metal) |
| 2 | Bolt (10 Nm) |
| 3 | Center part timing belt cover (carbon + plastic part) |
| 4 | Upper timing belt cover |
| 5 | Timing belt |
| 6 | Belt guide |
| 7 | Mounting bolt (27 Nm) |
| 8 | Timing belt pulley bolt (65 Nm) |
| 9 | Timing belt pulley |
| 10 | Timing belt tensioner guide |
| 11 | Ring |
| 12 | Timing belt tensioner system |
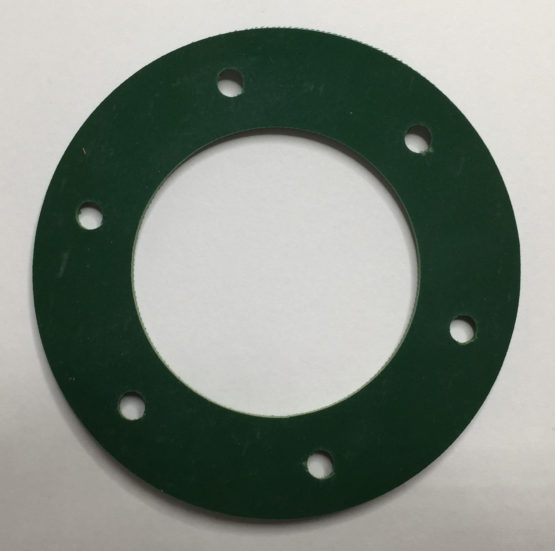
| 13 | O-ring (replace or replace including waterpump) |
| 14 | Water pump |
| 15 | Water pump tightening bolt (15 Nm) |
| 16 | Timing belt pulley |
| 17 | Timing belt pulley (90Nm; + 90 degrees) |
| 18 | Bolt (15 Nm) |
| 19 | Bolt (25 Nm) |
Note: The timing belt only drives the exhaust camshaft. The exhaust camshaft drives the inlet port camshaft via a timing chain drive system.
Removal of the timing belt
Remove the alternator poly-V belt including the tensioner system.
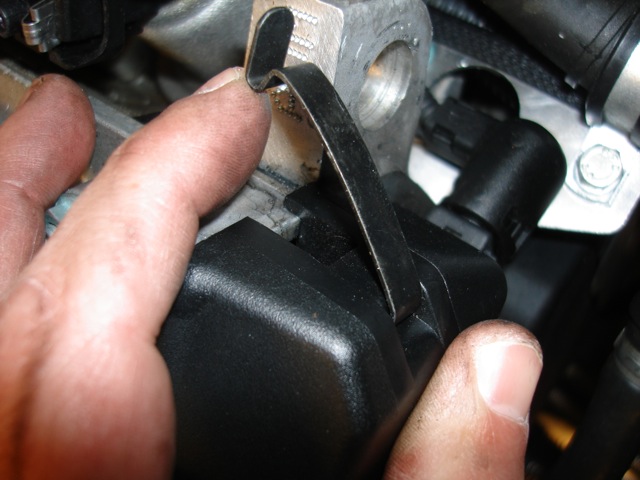
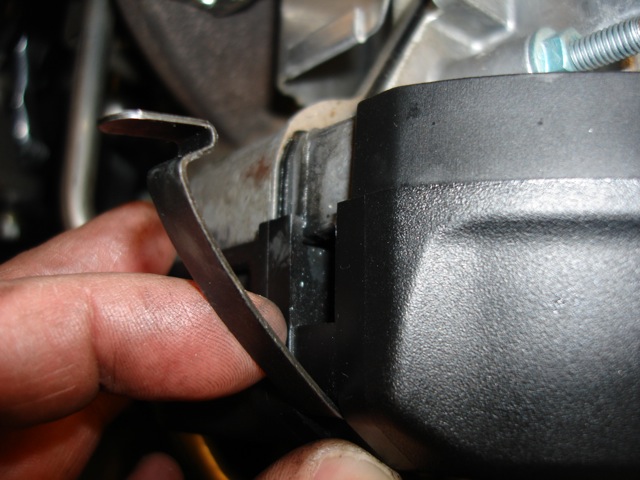
Click-remove the two metal upper timing belt fixation points from the timing belt cover and remove the plastic cover part.
Make timing belt direction markings markings using chalk or a black marking pen.
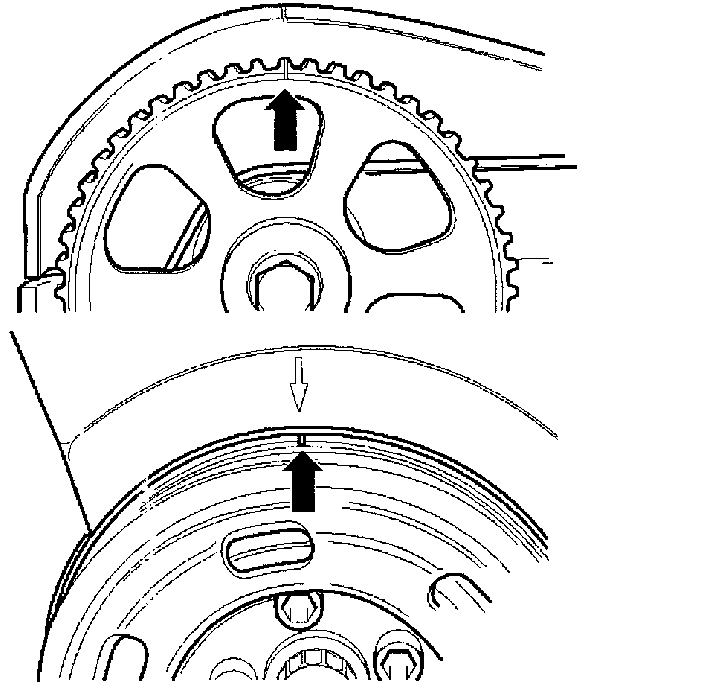
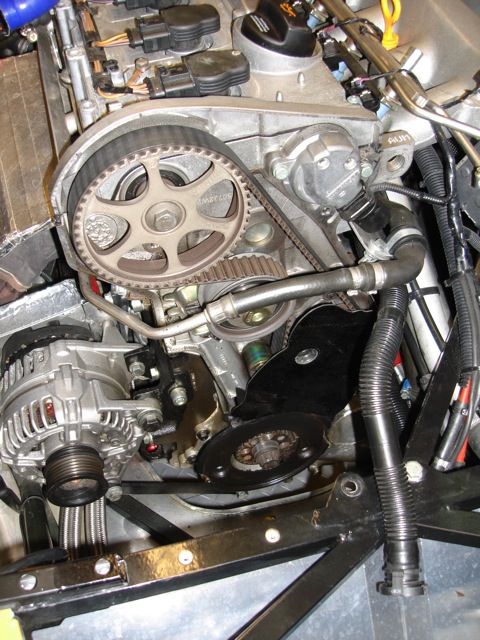
Turn the crankshaft using a multi teeth (Number 19) socket wrench until the piston of cilinder number 1 is at the end of TDC (top dead center. The timing marks should be in the same position as shown left above. The upper camshaft wheel: Marking oppositie to the camshaft housing. Lower part: crankshaft pulley / vibration dampener in line with the lower timing belt marking.
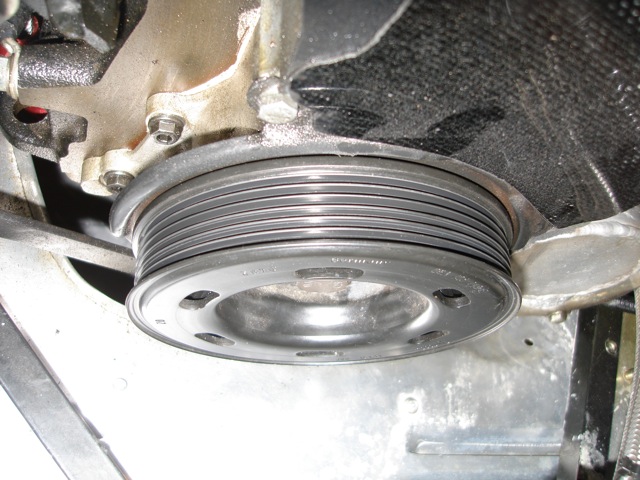
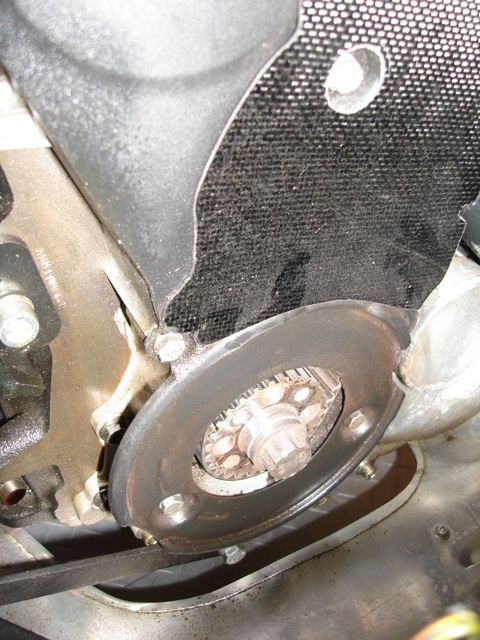
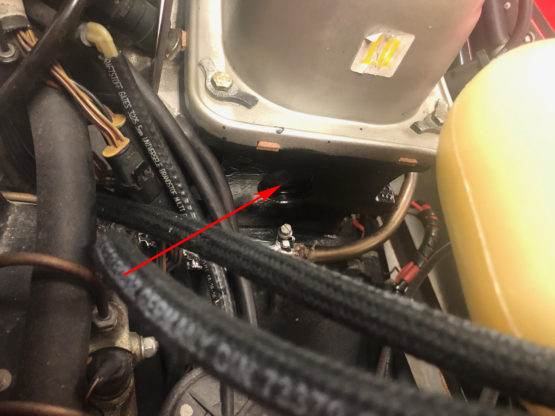
Remove the vibration dampener / poly V-belt pulley from the crankshaft. Remove lower and mid section covers. There are four fasteners that secure the lower timing belt cover. The two nearest the crankshaft are a 10mm bolt to the left (this is the one with the socket on it in this photo) and a 5mm Allen bolt in the hole just above the crankshaft sprocket.


Use an Allen key into the opening as shown on the left image, and slowly turn it left until the tensioner piston can be fixated with special tool T10008.
Note: The tensioner uses oil for the dampening of the timing belt and can only be compressed extremely slowly using continuous but controlled force. Quick compressing can chase damage to the tensioner wheel and tensioner. Release the tensioner mounting nut (1) counter clock wise and turn the tensioner body slowly to the right using a special tool 3387.
Note: Do not bend the off center mechanism fixation point. Now turn the tensioner to the left until the special tool T10008 can be mounted. Now remove the timing belt.
<Water pump removal and installation, when applicable>
Mounting of the new timing belt including tension procedure
Note: When re-mounting the timing belt, be careful that the crankshaft is not in the TDC (op dead center) otherwise the valves could potentially hit the pistons causing damage to both pistons and valves. The timing marks should be in the same position as shown left below.
Mount a new drive belt for the dry-sump system (when fitted) and apply the correct tension.
Make sure that the belt does not hit a hump in the drive belt housing. Mount the new timing belt over the crankshaft pulley. When you remount a used belt, make sure you mount it in the correct direction.
Mount the lower part of the belt cover. Mount the vibration dampener / poly V-belt pulley using new bolts and fixate with the correct tightening tension (10 Nm +90°). Mounting is only possible in one way.
Turn the crankshaft in TDC (top dead center). Mount the timing belt over the waterpump, tensioner and camshaft pulley.
Apply the correct tension. Note: when the tensioner is fully extended it needs to be pressed back including the tension pressure roller.
This can take as long as 5 minutes. Do not apply to much pressure, as this may damage the tensioner and tensioner wheel.
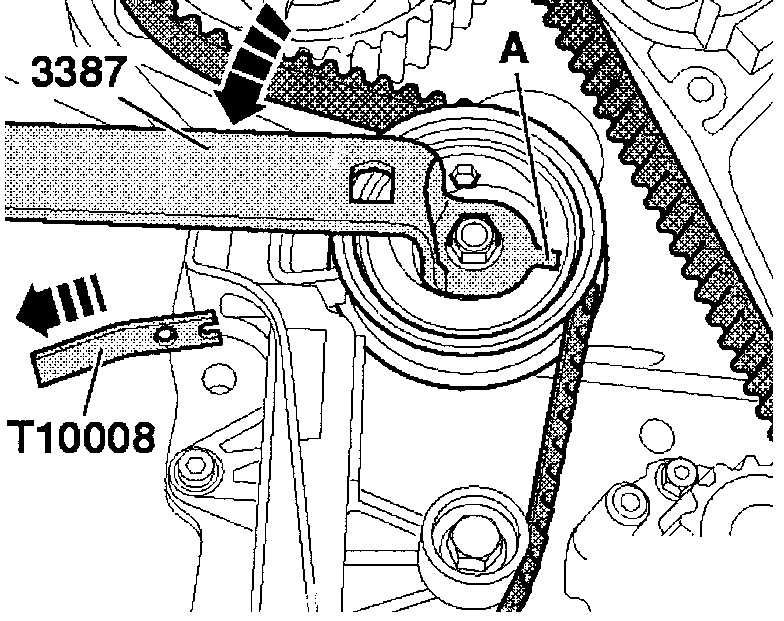
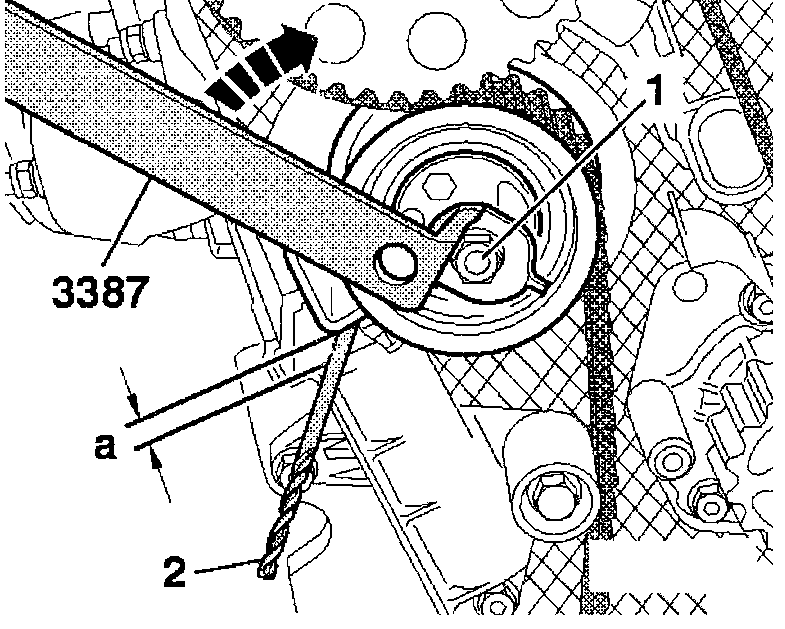
Turn the excenter mechanism anti clockwise using special tool 3387, until the locking tool T10008 can be removed without effort. Do not bend locking point A of the excenter. Turn the mechanism clockwise until it is possible to mount a 8mm drill between the housing of the tensioner system as shown in the right hand picture detail.
Keep the tensioner in this position and lock the nut with a tension of 27 Nm. Turn the crankshaft two full revolutions and check the marking points. If not, repeat the procedure.
Check if a drill with a size of 6-10 mm cam be mounted between the housing and the tensioner. If not. Repeat the procedure of tightening the timing belt. Mount the middel and top part of the timing belt cover. Mount the poly V-belt tensioner system. Mount all remaining parts in reverse order compared to the removal procedure.
Here’s 2 video’s which shows you some additional tricks
The 1st one is with a high performance belt mounted.
1.8 20V Manual download in Dutch language, click the PDF button to start downloading

One thought on “Timing belt replacement Audi 1.8 T20V”
Comments are closed.